Graphical Sessions (With Flight) on Stanage
Graphical desktop access to an interactive session can be achieved using Flight Desktop and TigerVNC. See below for simple usage instructions.
Usage instructions
Download and install TigerVNC on your machine. TigerVNC is a program that allows you to efficiently view graphical programs on one computer that are actually running on another computer.
After connecting to Stanage (see Establishing a SSH connection), start an interactive session with the following command:
srun --pty bash -i
Tip
You may wish to consider requesting more resources for your session, please see requesting an interactive session on slurm
Initialise and start Flight Desktop:
flight start # Start the Flight environment to enable further Flight commands
flight desktop verify xfce   # only do this once
flight desktop start --geometry 1800x1000 xfce
Warning
If you get a warning about “missing prerequisites”, please ensure you have requested an interactive session and your terminal shows node001 or node002.
In the case of “missing prerequisites” warnings while in an interactive session, please see troubleshooting:
The following is example output:
  Starting a 'xfce' desktop session:

 ✅ Starting session

  A 'xfce' desktop session has been started.

  == Session details ==

    Identity: 8db560e9-d56e-4776-81d2-037c690279bc
        Type: xfce
     Host IP: 10.10.1.1
    Hostname: node001
        Port: 5911
     Display: :11
    Password: l7IdD9I0

  This desktop session is not directly accessible from outside of your
  cluster as it is running on a machine that only provides internal
  cluster access.  In order to access your desktop session you will need
  to perform port forwarding using 'ssh'.

  Refer to 'flight desktop show 8db561e9' for more details.

  If prompted, you should supply the following password: l7IdE9I0
Get details of the desktop session using the command provided in the previous output:
flight desktop show xxxx # xxxx = session number
The following is example output:
      == Session details ==

    Identity: 8db560e9-d56e-4776-81d2-037c690269bc
        Type: xfce
    Host IP: 10.10.1.1
    Hostname: node001
        Port: 5911
    Display: :11
    Password: l7IdD9I0

  This desktop session is not directly accessible from outside of your
  cluster as it is running on a machine that only provides internal
  cluster access.  In order to access your desktop session you will need
  to perform port forwarding using 'ssh':

    ssh -L 5911:10.10.1.1:5911 te1st@

  Once the ssh connection has been established, depending on your
  client, you can connect to the session using one of:

    vnc://te1st:l7IdD9I0@localhost:5911
    localhost:5911
    localhost:11

  If, when connecting, you receive a warning as follows, try again with
  a different port number, e.g. 5912, 5913 etc.:

    channel_setup_fwd_listener_tcpip: cannot listen to port: 5911

  If prompted, you should supply the following password: l7IdD9I0
Tip
- Take note of the lines which have been highlighted above:
a port number, (5911),
an
sshcommand you run on your local machine which connects the VNC session to your local machine,a temporary VNC password (l7IdD9I0) which is valid only for your current VNC session.
Leave that terminal running. And, open another local terminal (ex. Windows PowerShell)
entering the provided ssh command including cluster hostname after the @ sign. If prompted for password, enter your university account password (not the flight generated temporary VNC password which is valid only for the current VNC session).
For example:
ssh -L 5911:10.10.1.1:5911 te1st@stanage.shef.ac.uk
This step will set up local port forwarding to the remote host (Stanage).
On your local machine start the ‘VNC Viewer’ program that comes with TigerVNC (this is called vncviewer on Linux). You should then see a dialog box like this:
Caution
Do not enter your normal university account password, use the temporary VNC password which was given in the flight desktop show command output.
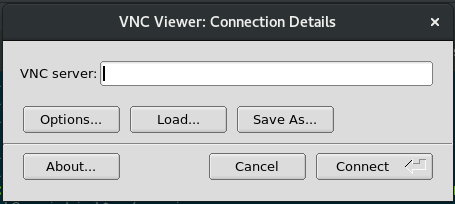
Using the previously given port number, enter the connection details into the TigerVNC dialog, for example:
localhost:5911
Click Connect, you will then be prompted for the temporary VNC password.
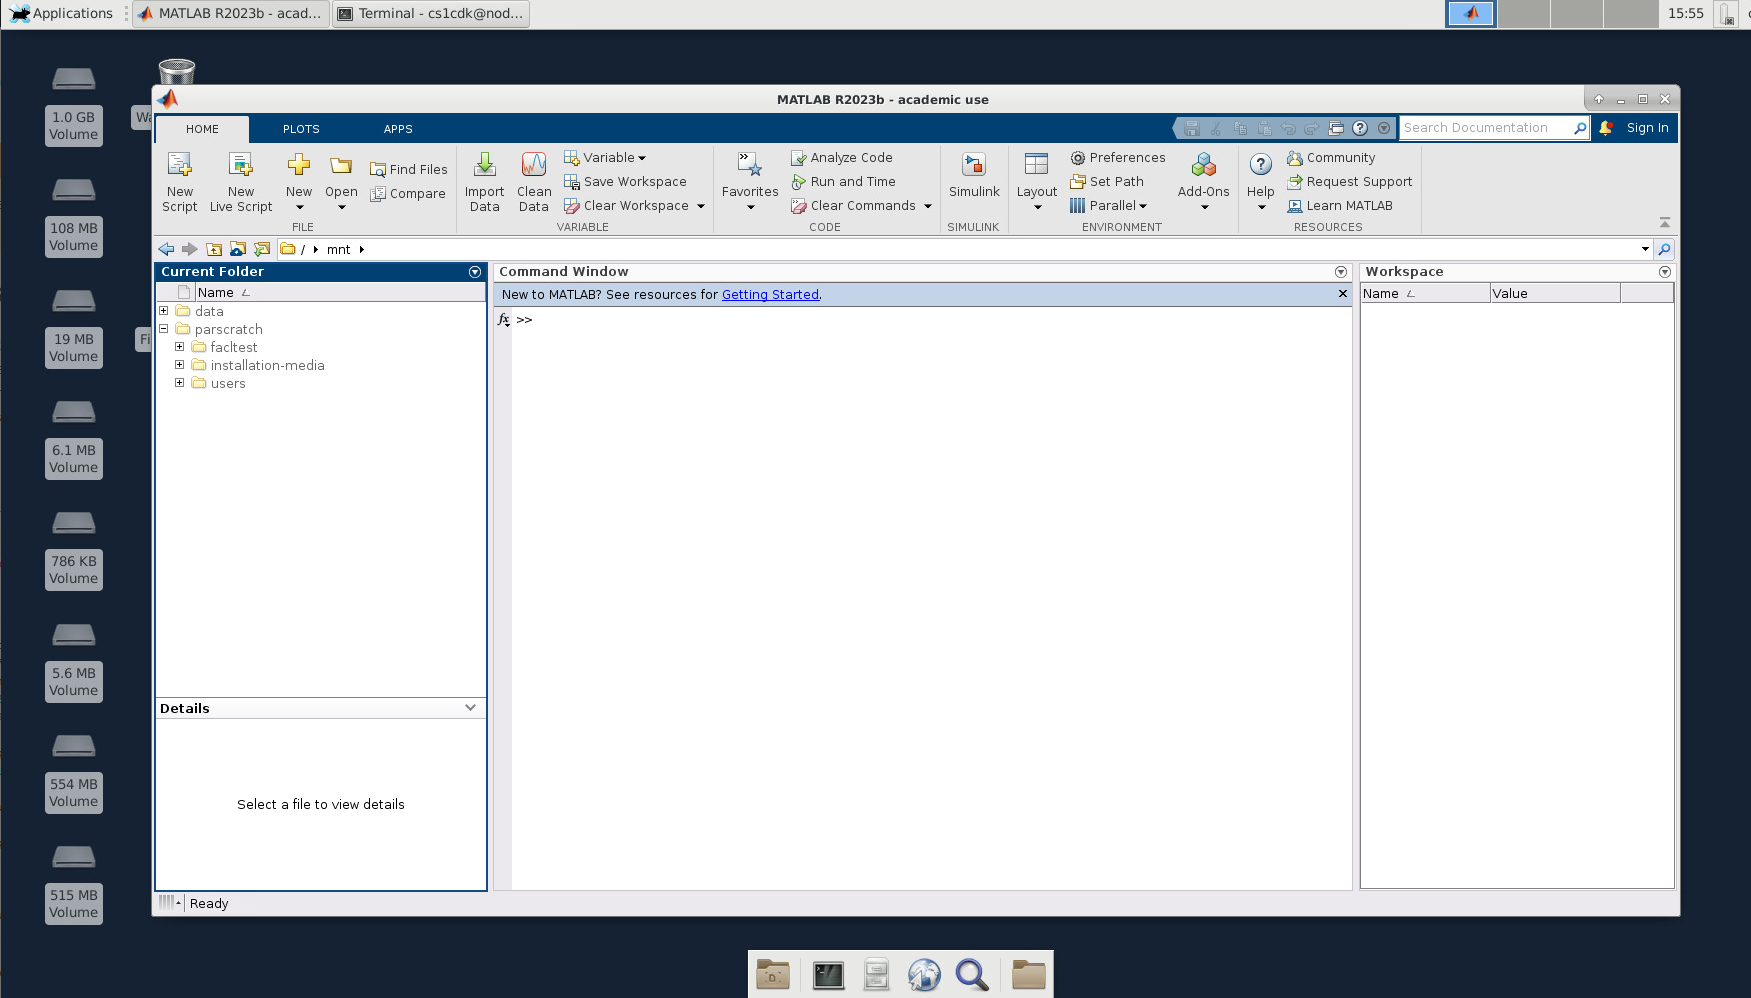
You should now see a desktop within a window, as below. This desktop is running within the interactive session we requested on Stanage.

You can click close on the error dialog. Then open a terminal at the bottom of the screen which will open inside the interactive session you first requested.
When you are finished, close VNC Viewer then return to the terminal within which you started Flight Desktop and log out or continue with other tasks.
Example
An example, starting a MATLAB GUI in TigerVNC Viewer by entering the following commands into the terminal
$ module load MATLAB/2023b
$ matlab
Troubleshooting
You’re seeing a “missing prerequisites”: error message:
Desktop type xfce has missing prerequisites:

* Repository: EPEL
Before this desktop type can be used, it must be prepared by your
cluster administrator using the 'prepare' command, i.e.:

  flight desktop prepare xfce
In most cases, this can be resolved using the following command:
mv ~/.local/share/flight/desktop ~/.local/share/flight/desktop_bk
Next verify again:
flight desktop verify xfce   # only do this once
flight desktop start --geometry 1800x1000 xfce
Then continue from here.
The GUI is slow or unresponsive:
You may wish to consider requesting more resources for your session, please see requesting an interactive session on slurm